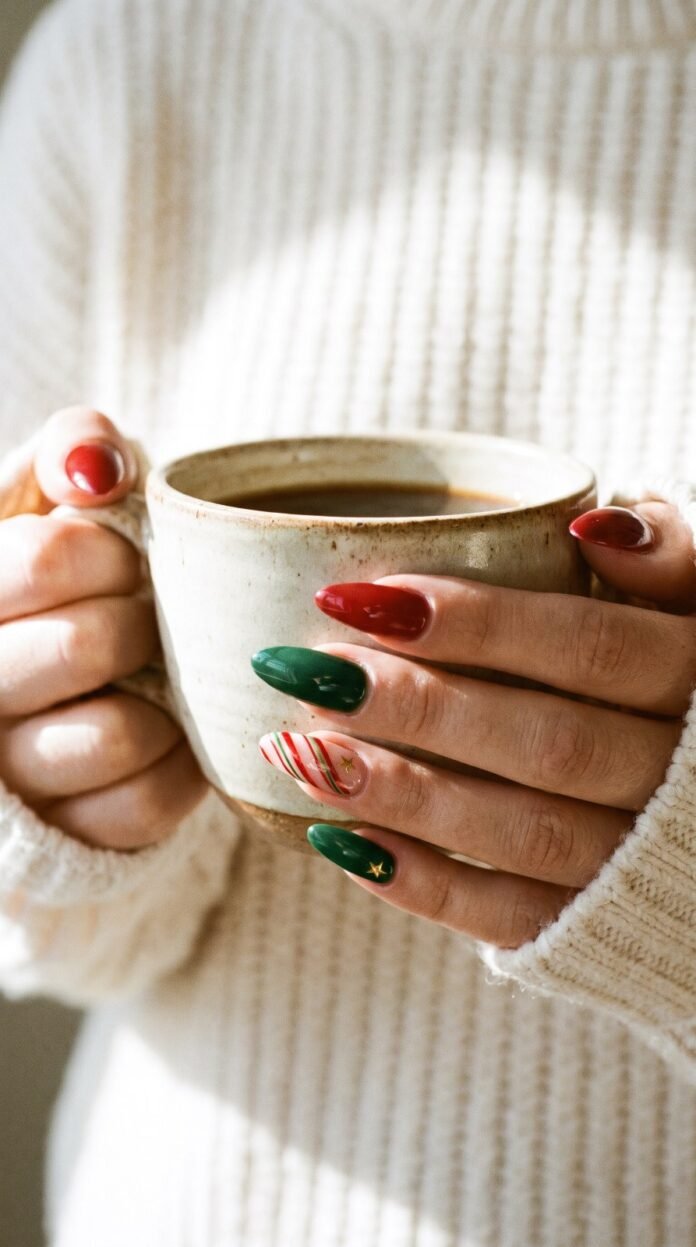

Get ready to brighten your hands with festive Christmas nails this holiday season. You will learn how to mix rich evergreen green, glossy berry red, candy cane stripes, and tiny gold stars. Follow our simple steps to get this clean salon finish right at home.
What Makes These Festive Christmas Nails Stand Out
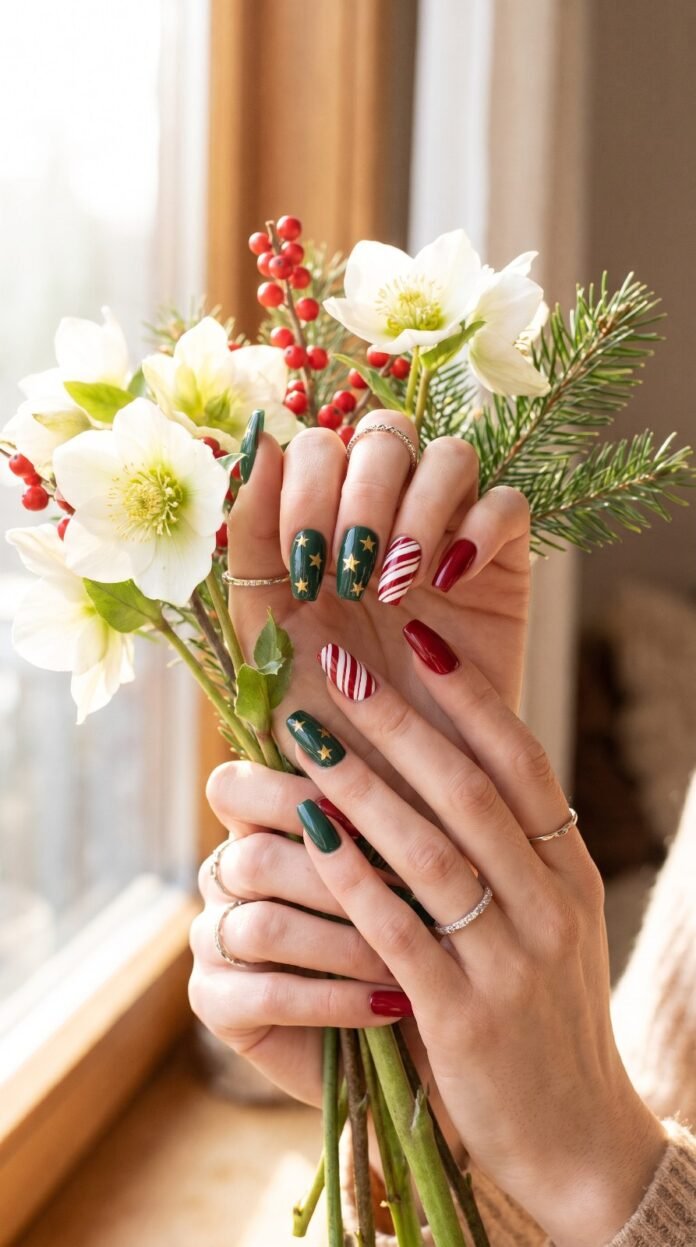
The beauty of this manicure comes from combining different classic holiday patterns across your fingers. Instead of painting every nail the same solid color, this set uses a mix and match style. Two nails feature deep pine green with crisp golden stars. Another nail features diagonal peppermint swirls with red and white lines, while the remaining nails shine in glossy red.
The shape in the picture is a tidy, mid-length coffin or square shape with softly smoothed edges. This flat tip gives you plenty of surface area to paint details like stars and clean stripes. When paired with dainty silver or gold stacking rings, the whole set feels polished and ready for every holiday party.
How Do You Do Candy Cane and Star Nails at Home?
Creating this festive look does not require professional salon equipment. With a steady hand, basic nail tools, and a bit of patience, you can paint each feature easily. Here is what you need to prepare before you start painting:
- A rich evergreen green polish.
- A deep, glossy cranberry red polish.
- A bright, opaque white polish.
- Small gold star nail stickers or gold nail foil.
- A thin nail art striping brush.
- A clear, high-shine top coat to seal everything.
Start with clean, filed nails and apply a good base coat to protect your natural nail bed. Let the base dry completely before applying your background colors. Paint your thumb and pinky in glossy red, your middle finger in white for the candy cane base, and your pointer and ring fingers in evergreen green.
Step-by-Step Guide for the Candy Cane Accent Nail
The candy cane accent nail is the brightest highlight of this festive Christmas nails set. Start by painting the entire nail with two thin coats of creamy white polish. Make sure each layer dries completely so the white stays smooth and streak-free under your red lines.
Dip your thin striping brush into the red polish, wiping off any excess on the edge of the bottle. Paint several diagonal red lines across the nail from top left to bottom right. You can alternate between one thicker line and two thinner lines to look just like real peppermint candy. Finish with a generous layer of top coat to smooth out the ridges.
Adding the Golden Stars on Evergreen Polish
The deep green nails look like fresh evergreen branches at night when you add the gold stars. Two coats of forest green polish will give you a solid, opaque background. Make sure the green polish is fully dry before attempting to add the gold accents so the stickers stick firmly.
- Use fine tweezers to gently peel small gold star stickers from their backing.
- Place two to three stars on each green nail, scattering them naturally from top to tip.
- Press each star down firmly using a silicone tool or the clean tip of your finger.
- If you prefer painting them by hand, use a fine detail brush and gold metallic polish to make tiny crisscross stars.
- Apply your clear top coat over the entire nail, capping the free edge to keep the stickers from lifting.
Using nail stickers saves time and keeps the stars sharp and symmetrical. The shiny gold creates a wonderful contrast against the dark green polish and catches the light beautifully.
Tips to Keep Your Holiday Manicure Looking Fresh
Winter weather can cause dry cuticles and chipped nail tips, which ruins the clean look of your holiday manicure. Always apply nourishing cuticle oil to your nail beds every evening before bed. This simple step keeps the skin around your fingers soft and stops rough hangnails from forming.
Wear rubber gloves whenever you wash dishes or handle household cleaning products. Water and harsh chemicals break down the bond between the nail polish and your natural nail. Adding a fresh coat of clear, shiny top coat every three days will lock in your gold stars, protect the candy cane stripes, and keep the set looking like you just walked out of the salon.